 跳到内容
跳到内容 As solar technology continues to advance and environmental awareness grows, more RV owners are turning to solar panels to power their adventures. Solar panels provide a clean, renewable source of energy that can help reduce reliance on traditional power sources, making off-grid travel more sustainable and enjoyable.
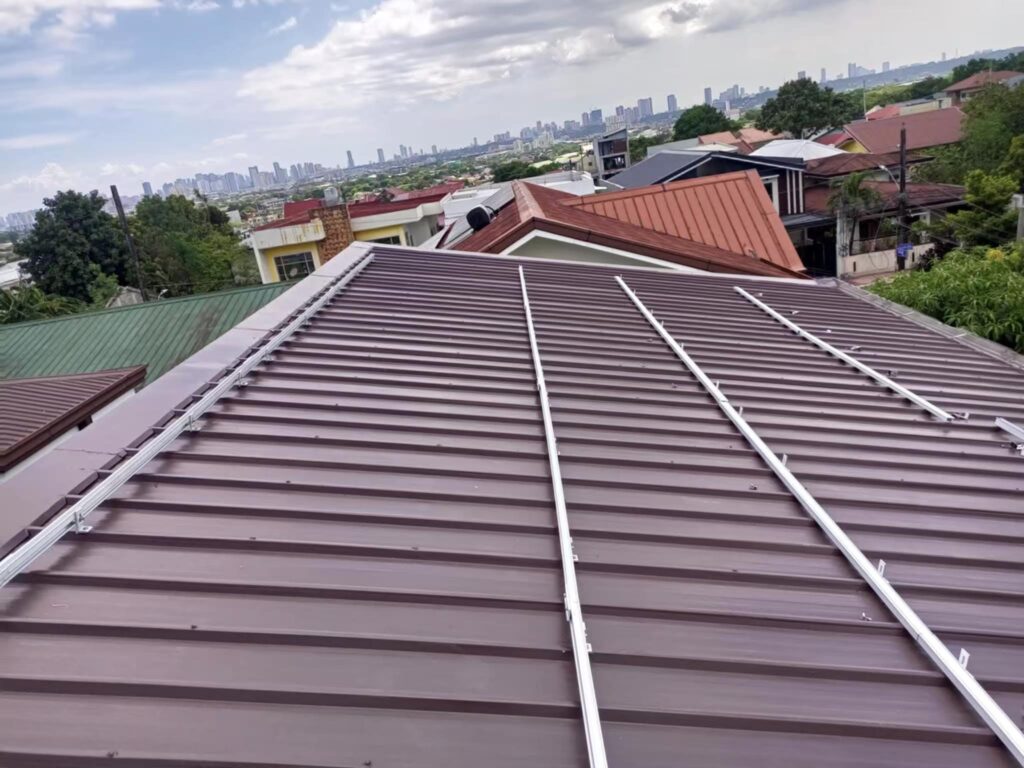
One of the most critical decisions when installing solar panels on an RV is selecting the right mounting hardware. The mounting system must be strong, durable, and compatible with the RV’s roof structure while also being cost-effective and easy to install. Among the many mounting options available, 3 inch Z brackets have gained popularity for their simplicity and affordability.
This article explores whether 3 inch Z brackets are suitable for mounting solar panels on an RV, covering their advantages, limitations, installation tips, and alternatives. By the end, you will have a clear understanding of how to best mount solar panels on your RV to maximize performance and safety.

Understanding Z Brackets and Their Role in Solar Panel Installation
What Are Z Brackets?
Z brackets are named after their characteristic “Z” shape. They are typically made from aluminum or stainless steel and serve as simple mounting hardware for solar panels. The bracket’s design creates a gap between the solar panel and the mounting surface, allowing airflow beneath the panel to improve cooling and efficiency.
Z brackets are widely used in RV solar installations due to their lightweight nature, corrosion resistance, and ease of installation. They are especially common for small to medium-sized solar panels.
Dimensions and Features of 3 Inch Z Brackets
The “3 inch” specification refers to the length of the bracket’s base or mounting arm. This size is generally suitable for solar panels ranging from small portable units to moderately sized rigid panels commonly used on RV roofs.
Key features of 3 inch Z brackets include:
- Lightweight and corrosion-resistant aluminum or stainless steel construction
- Simple design that facilitates quick installation
- Allows airflow under the solar panel to reduce heat buildup
- Low cost compared to more complex mounting systems
However, these brackets do not provide adjustable tilt angles, which can be a drawback for optimizing solar panel orientation relative to the sun.
Key Considerations for Installing Solar Panels on an RV
Selecting the Right Location on Your RV Roof
Choosing the optimal location for solar panels on your RV roof is essential for maximizing energy production and ensuring safe installation. Consider the following:
- Unobstructed Sunlight: Avoid areas shaded by vents, antennas, or air conditioning units.
- Flat and Stable Surface: A flat roof section facilitates secure mounting and reduces stress on the panels.
- Adequate Ventilation: Leaving space between the panel and roof allows airflow to cool the panels.
- Accessibility: Position panels where you can easily clean and maintain them.
Installation Methods
There are two primary installation methods for RV solar panels:
- Screw-mounted brackets: This involves drilling holes into the RV roof and securing the brackets with screws and sealant. It provides a strong, durable mount but requires careful sealing to prevent leaks.
- Adhesive mounting: Using strong adhesives or tapes to fix the panels without drilling holes. This method is less invasive but may not be as secure or long-lasting.
Safety and Waterproofing
When drilling into your RV roof, it’s crucial to use appropriate sealants and gaskets to prevent water intrusion. Neglecting waterproofing can lead to leaks and costly damage.
Advantages of Using 3 Inch Z Brackets for RV Solar Panels
- Cost-Effective: 3 inch Z brackets are among the most affordable mounting options, making them attractive for budget-conscious RV owners.
- Lightweight: They add minimal weight to your RV roof, preserving fuel efficiency and vehicle handling.
- Easy to Install: Their straightforward design allows for quick installation, often manageable by DIY enthusiasts.
- Good Ventilation: The bracket’s shape creates a gap between the panel and roof, improving airflow and reducing panel temperature.
- Durability: Made from corrosion-resistant materials, Z brackets withstand outdoor conditions well.

Limitations of 3 Inch Z Brackets on RV Solar Installations
- Limited Load Capacity: These brackets are best suited for small to medium panels. Larger or heavier panels may exceed their load-bearing capacity, risking damage or detachment.
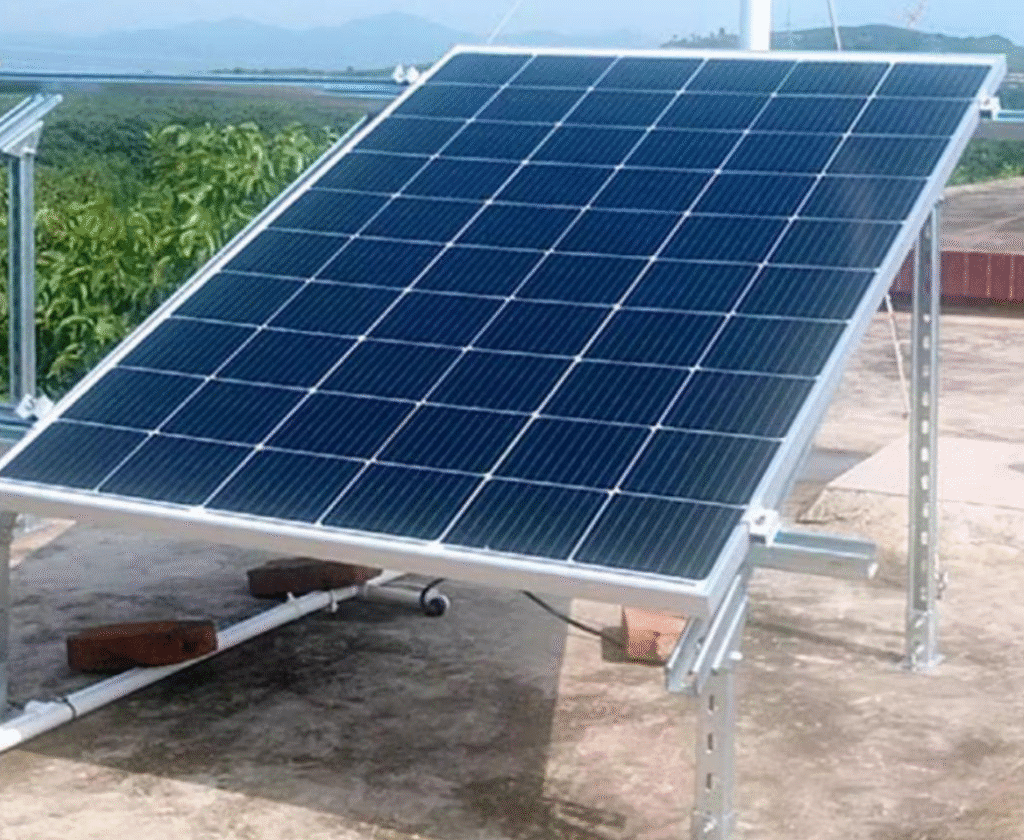
- No Tilt Adjustment: Fixed brackets do not allow you to adjust the panel’s angle, which can reduce energy harvest efficiency, especially in winter or at higher latitudes.
- Roof Penetration Required: Installation requires drilling holes in the RV roof, which must be carefully sealed to avoid leaks.
- Aesthetic Considerations: The visible gap and brackets may not be as sleek as flush-mounted or integrated systems.
Comparison Table: 3 Inch Z Brackets vs Other Common RV Solar Panel Mounting Options
| Feature | 3 Inch Z Brackets | Flush Mount Brackets | Tilt Mount Brackets | Adhesive Mounting |
|---|---|---|---|---|
| Cost | Low | Moderate | Higher | Moderate |
| Weight | Very Light | Light | Moderate | Very Light |
| Installation Complexity | Easy (requires drilling and sealing) | Moderate (requires precise alignment) | Complex (requires adjustable hardware) | Easy (no drilling) |
| Adjustable Tilt Angle | No | No | Yes | No |
| Load Capacity | Suitable for small to medium panels | Suitable for medium to large panels | Suitable for large panels | Limited |
| Ventilation | Good (creates air gap) | Moderate (flush to roof) | Good (air gap with tilt) | Poor (panel flush with roof) |
| Waterproofing Risk | Moderate (due to roof penetration) | Moderate | Moderate | Low |
| Durability | High (aluminum/stainless steel) | High | High | Moderate (adhesive may degrade) |
| Aesthetic Appeal | Moderate (visible brackets and gap) | High (flush and sleek) | Moderate (visible hardware) | High (clean appearance) |
Installation Tips for Using 3 Inch Z Brackets on Your RV
- Choose Quality Brackets: Opt for corrosion-resistant aluminum or stainless steel brackets to ensure longevity.
- Use Proper Sealants: After drilling, apply high-quality marine-grade sealants around screws and holes to prevent leaks.
- Pre-Drill Holes: Pre-drill holes in the solar panel frame to avoid cracking the panel during installation.
- Secure Wiring: Route solar panel wiring carefully to avoid damage and maintain a clean installation.
- Check Roof Integrity: Inspect your RV roof for any damage or weakness before installation.
- Use Lock Washers or Thread Lock: To prevent screws from loosening due to vibrations during travel.
- Test Stability: After installation, gently test the panel’s stability to ensure secure mounting.
Alternative Mounting Options for RV Solar Panels
While 3 inch Z brackets are a popular choice, other mounting systems may better suit your needs depending on your solar panel size, budget, and desired features.
- Flush Mount Brackets: These brackets mount the panel close to the roof surface, offering a sleek look and lower wind resistance but usually require precise installation.
- Tilt Mount Brackets: Allow you to adjust the panel angle to optimize sun exposure, especially useful for stationary RVs or seasonal adjustments.
- Rail Mount Systems: Use rails fixed to the roof with adjustable clamps, providing flexibility and strong support for large panels.
- Adhesive Mounting: Suitable for flexible solar panels or temporary setups, avoiding roof penetration but with limited durability.
Why Choose CChannelSteel.com for Your Solar Panel Mounting Needs?
At CChannelSteel.com, we specialize in high-quality metal mounting solutions tailored for solar panel installations on RVs, boats, and other mobile platforms. Our products are engineered for durability, corrosion resistance, and ease of installation, ensuring your solar setup remains secure and efficient for years to come.
We offer a variety of mounting brackets, including custom-sized Z brackets, flush mounts, and rail systems, all manufactured with precision and tested to withstand harsh outdoor environments.
By choosing our products, you benefit from:
- Expertly engineered designs optimized for solar panels
- Premium materials such as anodized aluminum and stainless steel
- Competitive pricing and bulk order discounts
- Responsive customer support and installation guidance
Visit cchannelsteel.com to explore our full range of solar panel mounting hardware and accessories.
Conclusion
Using 3 inch Z brackets for mounting solar panels on your RV is a viable and cost-effective option, especially for small to medium-sized panels. Their lightweight, corrosion resistance, and ease of installation make them a favorite among DIY RV solar installers.
However, their limitations in load capacity and lack of tilt adjustment mean they may not be suitable for larger solar arrays or users seeking maximum energy efficiency through panel angling.
Careful installation with proper sealing is crucial to prevent roof leaks and ensure long-term durability. For those needing adjustable tilt or supporting larger panels, alternative mounting systems such as tilt mounts or rail systems may be better suited.
Ultimately, the choice depends on your specific solar panel size, budget, and installation preferences. Whether you choose 3 inch Z brackets or another mounting method, investing in quality hardware from reputable suppliers like CChannelSteel.com will help ensure your RV solar system performs reliably on all your adventures.
If you would like, I can also assist with detailed installation guides, product recommendations, or custom mounting solutions tailored to your RV solar setup. Just let me know!
