 跳到内容
跳到内容 As solar energy adoption continues to surge worldwide, optimizing solar panel performance has become a key concern for both residential and commercial users. One of the most effective ways to maximize energy production is by adjusting the angle of solar panels to capture the most sunlight throughout the year. This is where solar panel tilt brackets come into play.
This article explores the question: Do you use solar panel tilt brackets? We will explain what tilt brackets are, their advantages, how to choose the right ones, and provide detailed installation guidance. Whether you are installing solar panels on your rooftop, ground mount, or mobile platform like an RV or boat, understanding tilt brackets is essential for maximizing your solar investment.

- What Are Solar Panel Tilt Brackets?
- Why Use Solar Panel Tilt Brackets?
- Types of Solar Panel Tilt Brackets
- Factors to Consider When Choosing Tilt Brackets
- Benefits of Using Tilt Brackets
- How to Install Solar Panel Tilt Brackets
- Optimal Tilt Angles for Solar Panels
- Maintenance Tips for Tilt Brackets
- Comparison Table of Popular Solar Panel Tilt Brackets
- Why Choose CChannelSteel for Your Solar Panel Brackets
- Conclusion
1. What Are Solar Panel Tilt Brackets?
Solar panel tilt brackets are specialized mounting brackets designed to hold solar panels at an adjustable angle relative to the mounting surface. Unlike fixed brackets that hold panels flat or at a fixed tilt, tilt brackets allow you to change the panel’s angle to better align with the sun’s path.
These brackets typically consist of a base that attaches to the roof or mounting surface and an adjustable arm or plate that supports the solar panel frame. The tilt angle can often be adjusted manually or with simple tools to optimize solar exposure seasonally or for specific geographic locations.
2. Why Use Solar Panel Tilt Brackets?
Using tilt brackets offers several key advantages:
- Maximize Energy Production: The sun’s position changes daily and seasonally. Adjustable tilt brackets allow panels to be positioned for maximum sunlight capture, increasing energy yield by up to 25% compared to fixed mounts.
- Seasonal Optimization: You can adjust the tilt angle to be steeper in winter when the sun is lower and flatter in summer when the sun is higher, optimizing year-round performance.
- Adapt to Roof or Ground Conditions: Tilt brackets can compensate for suboptimal roof angles or flat surfaces, enabling panels to be mounted at the ideal angle regardless of the underlying structure.
- Reduce Dirt and Snow Accumulation: Panels tilted at a proper angle shed dirt, debris, and snow more effectively, maintaining efficiency and reducing maintenance.
- Flexibility for Mobile Applications: On RVs, boats, or temporary installations, tilt brackets allow users to adjust panel angles as needed for travel or changing environments.
3. Types of Solar Panel Tilt Brackets
There are several types of tilt brackets designed for different applications and mounting surfaces:
3.1 Adjustable Tilt Brackets
These brackets allow manual adjustment of the tilt angle within a certain range, typically between 10° and 30°. Users can set the angle seasonally or as needed. They often feature multiple pre-drilled holes or sliding arms for angle selection.
3.2 Fixed Tilt Brackets
Fixed tilt brackets hold panels at a single, non-adjustable angle. They are simpler and cheaper but lack flexibility. Suitable for installations where the roof pitch matches the optimal solar angle.
3.3 Rail-Mounted Tilt Brackets
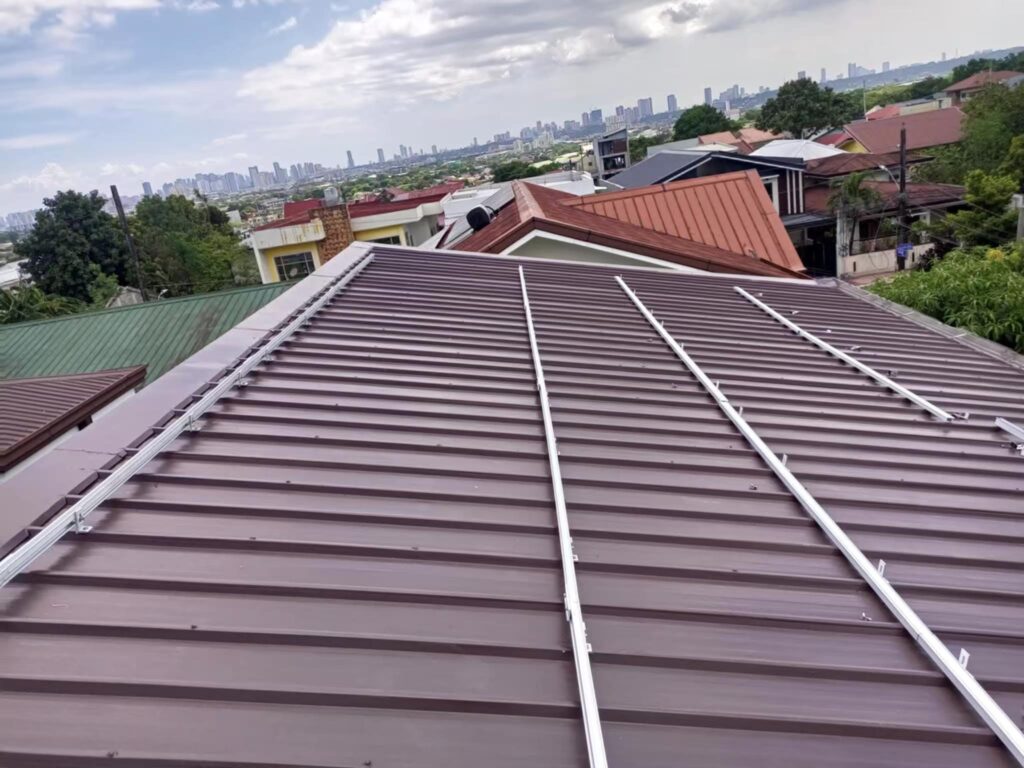
Used with mounting rails, these brackets allow tilt adjustment while supporting large solar panel arrays on rooftops or ground mounts.
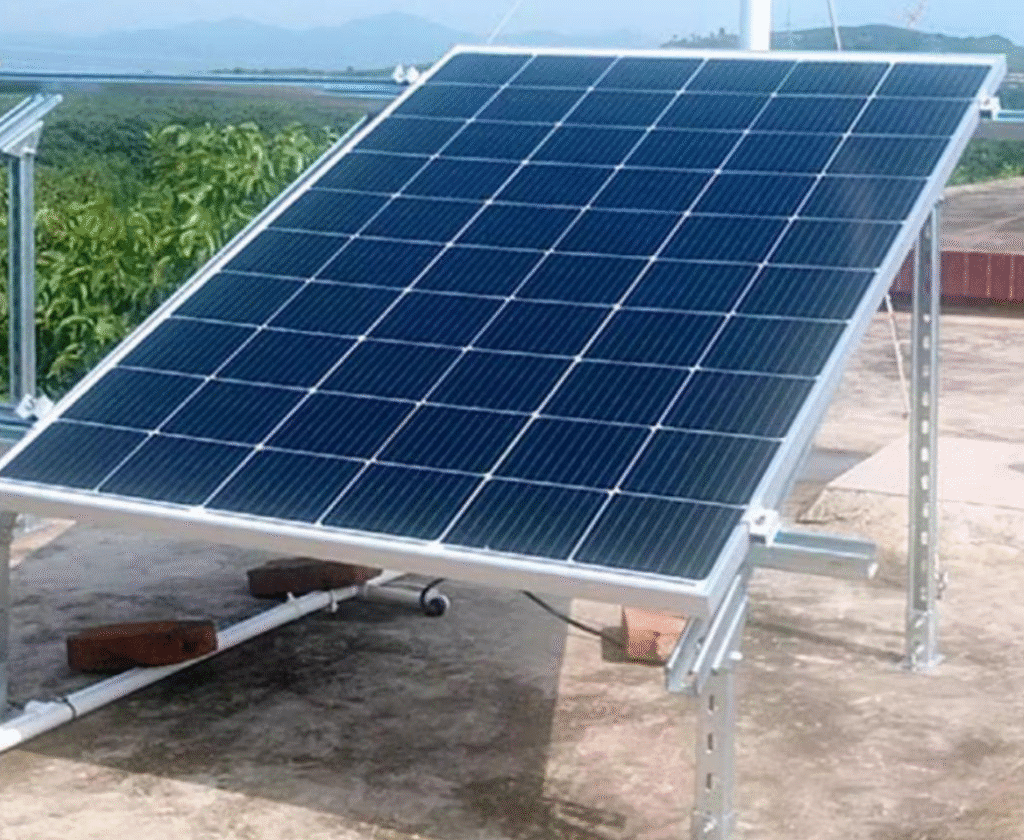
3.4 Portable Tilt Brackets
Lightweight and compact, these are designed for mobile solar panels on RVs, boats, or camping setups. They allow quick angle adjustment and easy transport.
4. Factors to Consider When Choosing Tilt Brackets
When selecting solar panel tilt brackets, consider the following:
- Material Quality: Aluminum alloy (e.g., AL6005-T5) with anodized finish is preferred for corrosion resistance and durability.
- Adjustable Angle Range: Typical ranges are 10°–15°, 15°–30°, or wider depending on your location and needs.
- Load Capacity: Ensure brackets can withstand local wind and snow loads (e.g., wind load <60 m/s, snow load <1.4 KN/m²).
- Compatibility: Brackets should fit your solar panel frame size and mounting hole pattern.
- Installation Surface: Roof type (metal, tile, flat), ground mount, or mobile platform.
- Ease of Installation: Look for pre-assembled or easy-to-adjust designs with clear instructions.
- Warranty and Service Life: Longer warranties (e.g., 12 years) and service life (20+ years) indicate product reliability.
5. Benefits of Using Tilt Brackets
| Benefit | Explanation |
|---|---|
| Increased Energy Output | Proper tilt can increase solar gain by up to 25%, especially in winter months. |
| Seasonal Flexibility | Adjust tilt angles to optimize solar capture throughout the year. |
| Improved Panel Longevity | Better drainage reduces dirt and snow buildup, preventing damage and efficiency loss. |
| Adaptability to Installation Site | Compensates for less-than-ideal roof slopes or flat surfaces. |
| Enhanced Safety and Stability | High-quality brackets provide secure mounting against wind and weather. |
| Cost-Effective Optimization | Adjustable brackets can reduce the need for more complex solar tracking systems. |
6. How to Install Solar Panel Tilt Brackets
Step 1: Assess Your Installation Site
- Identify the mounting surface type (roof, ground, RV).
- Measure solar panel dimensions and layout.
- Check for obstructions and shading.
Step 2: Select Appropriate Tilt Brackets
- Choose brackets compatible with your panel size and mounting surface.
- Confirm adjustable angle range suits your location.
Step 3: Mark and Drill Mounting Points
- Mark bracket positions on the mounting surface aligned with panel mounting holes.
- Drill pilot holes carefully to avoid damage.
Step 4: Attach Brackets to Surface
- Install waterproof flashing under brackets on roofs.
- Secure brackets with corrosion-resistant bolts or screws.
- Apply sealant around holes to prevent leaks.
Step 5: Assemble Tilt Mechanism
- Attach adjustable arms or plates to brackets.
- Set initial tilt angle according to your location or season.
Step 6: Mount Solar Panels
- Align panels with bracket holes.
- Secure panels with bolts and washers.
- Verify panel alignment and stability.
Step 7: Adjust Tilt Angle
- Fine-tune tilt angle using bracket adjustment features.
- Tighten all fasteners securely.
Step 8: Final Inspection
- Check for loose bolts or gaps.
- Ensure waterproofing is intact.
- Test panel stability by applying gentle pressure.
7. Optimal Tilt Angles for Solar Panels
The ideal tilt angle depends on your geographic latitude and seasonal sun path. General guidelines include:
- Latitude Rule: Tilt angle ≈ Latitude ± 15°. For example, at 35° latitude, tilt between 20° and 50°.
- Seasonal Adjustment: Increase tilt angle in winter (sun lower), decrease in summer (sun higher).
- Fixed Tilt Recommendation: If adjusting seasonally is impractical, set tilt close to your latitude for balanced year-round performance.
Using adjustable tilt brackets allows you to implement these seasonal changes easily, optimizing energy production.

8. Maintenance Tips for Tilt Brackets
- Inspect brackets annually for corrosion, loosening, or damage.
- Clean panels and brackets regularly to prevent debris buildup.
- Reapply sealant if cracks or gaps appear around mounting points.
- Tighten bolts as needed to maintain secure mounting.
- Lubricate moving parts if your tilt brackets have hinges or sliders.
9. Comparison Table of Popular Solar Panel Tilt Brackets
| Product/Brand | Material | Adjustable Angle Range | Load Capacity (Wind/Snow) | Application | Warranty | Features |
|---|---|---|---|---|---|---|
| CChannelSteel Tilt Bracket | AL6005-T5 Aluminum | 15°–30° | Wind <60 m/s, Snow <1.4 KN/m² | Roofs, RVs, Boats, Flat Surfaces | 12 years | Lightweight, anodized, easy adjustment |
| Mibet Adjustable Tilt Bracket | Aluminum + EPDM Rubber | 10°–15°, 15°–30° | High wind resistance | Off-grid systems, marine, RV | 10+ years | Waterproof base, flexible angle settings |
| Super Solar Tilt Mount | AL6005-T5, SUS304 | 15°–30° | Wind <60 m/s, Snow <1.4 KN/m² | Metal roofs, caravans, boats | 12 years | Pre-assembled, corrosion resistant |
| Generic Fixed Tilt Bracket | Aluminum | Fixed (varies) | Moderate | Flat or pitched roofs | 5-10 years | Simple design, low cost |
10. Why Choose CChannelSteel for Your Solar Panel Brackets?
At CChannelSteel, we specialize in manufacturing premium solar panel brackets, including tilt brackets designed for durability, ease of installation, and optimal solar performance.
Our Advantages:
- High-Quality Materials: We use 6005-T5 aluminum alloy with advanced anodizing for corrosion resistance and longevity.
- Wide Product Range: From adjustable tilt brackets to fixed mounts, suitable for residential, commercial, and mobile solar systems.
- Custom Solutions: We offer customization to meet your specific project requirements.
- Competitive Pricing: Quality products at affordable prices.
- Technical Support: Expert guidance throughout your installation process.
Choose CChannelSteel to ensure your solar panels are mounted securely and efficiently for maximum energy production.
11. Conclusion
Using solar panel tilt brackets is a smart choice for anyone looking to maximize the efficiency and lifespan of their solar energy system. Adjustable tilt brackets allow you to optimize panel angles seasonally, increase energy output, and adapt to various mounting surfaces. Proper installation and maintenance of these brackets ensure safety, durability, and consistent performance.
If you want to enhance your solar setup with reliable, high-quality tilt brackets, visit CChannelSteel to explore our product offerings and get professional support tailored to your needs.
Harness the full potential of solar power with the right mounting hardware — start with the right solar panel brackets today!
