 跳到内容
跳到内容 Solar energy is one of the fastest-growing renewable energy sources worldwide. As more homeowners, businesses, and mobile users like RV owners adopt solar power, the importance of proper installation techniques becomes paramount. Central to every solar panel installation are solar panel brackets — the hardware that ensures your solar panels are securely mounted, correctly oriented, and able to withstand environmental stresses such as wind, snow, and rain.
This comprehensive guide will walk you through how to install solar panel brackets effectively, covering everything from understanding different types of brackets, choosing the right materials, preparing your installation site, to step-by-step installation instructions. Whether you are a DIY enthusiast, a professional installer, or a business owner looking to expand your knowledge, this article will provide you with the insights and practical advice you need.


- Introduction to Solar Panel Brackets
- Why Proper Installation of Solar Panel Brackets Matters
- Types of Solar Panel Brackets and Their Applications
- Materials and Tools Needed for Installation
- Preparing Your Installation Site
- Step-by-Step Guide to Installing Solar Panel Brackets
- Safety Considerations During Installation
- Common Installation Challenges and How to Overcome Them
- Maintenance and Inspection Tips for Solar Panel Brackets
- Comparison Table of Popular Solar Panel Brackets
- How to Choose the Right Solar Panel Brackets for Your Project
- Why Choose CChannelSteel for Your Solar Panel Brackets
- Conclusion
1. Introduction to Solar Panel Brackets
Solar panel brackets are the mounting hardware used to attach solar panels securely to a variety of surfaces, including rooftops, ground mounts, poles, and mobile platforms like RVs and boats. They are designed to hold solar panels firmly in place, resist environmental forces, and maintain the optimal angle for sunlight exposure.
The choice of brackets and the quality of their installation directly affect the performance, safety, and longevity of your solar energy system. A well-installed bracket system prevents panel damage, ensures structural integrity, and avoids issues such as roof leaks or wind damage.
2. Why Proper Installation of Solar Panel Brackets Matters
Proper installation of solar panel brackets is crucial for several reasons:
- Structural Safety: Secure mounting prevents panels from detaching during high winds or storms, protecting both the panels and people nearby.
- System Efficiency: Correctly angled and positioned panels maximize sunlight absorption, improving energy output.
- Roof Integrity: Proper flashing and sealing around mounting points prevent water infiltration and roof damage.
- Longevity: High-quality brackets and installation reduce wear and tear, extending the service life of your solar system.
- Compliance: Meets local building codes, insurance requirements, and warranty conditions.
Neglecting proper installation can lead to costly repairs, system downtime, and safety hazards.
3. Types of Solar Panel Brackets and Their Applications
Understanding the different types of solar panel brackets helps you select the right mounting solution for your specific installation.
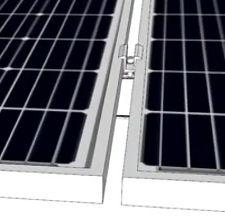
3.1 Z Brackets
- Description: Named for their Z-shaped profile, these brackets are compact and lightweight.
- Material: Usually anodized aluminum.
- Applications: Ideal for small solar panels on RV roofs, boats, or uneven surfaces.
- Advantages: Easy to install, corrosion-resistant, allows some airflow beneath panels.
3.2 L Brackets
- Description: Simple right-angle brackets.
- Material: Aluminum or stainless steel.
- Applications: Flat roofs, walls, or other flat mounting surfaces.
- Advantages: Cost-effective, straightforward installation.
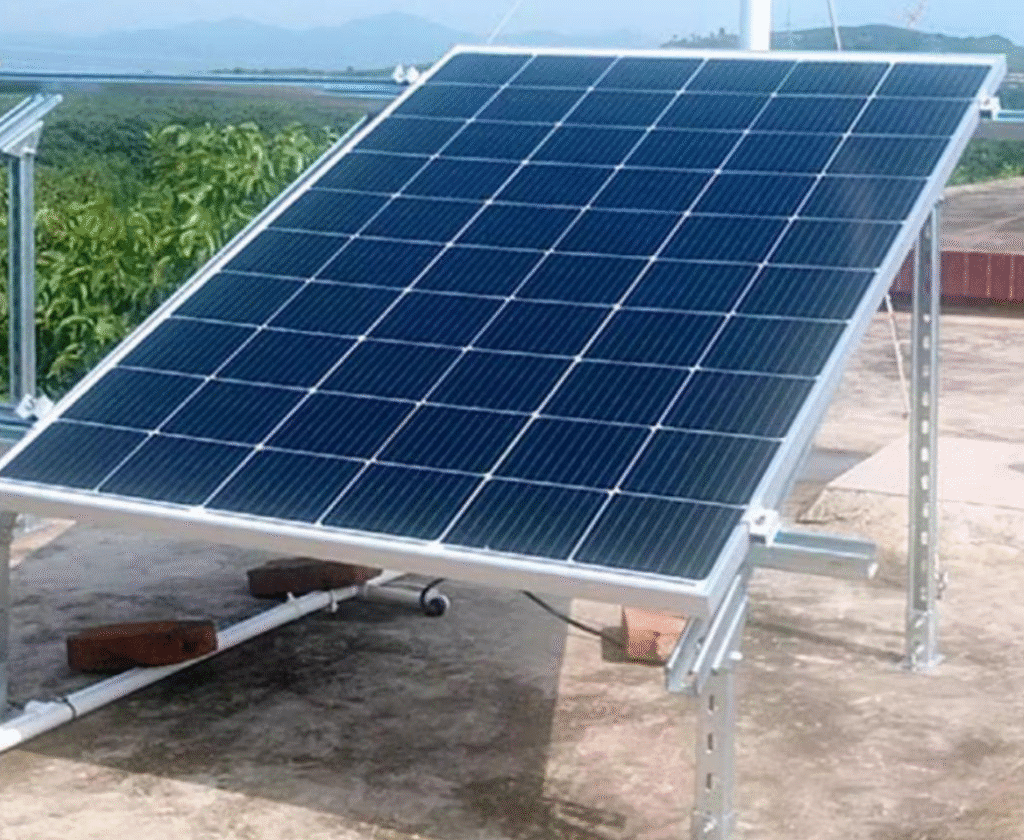
3.3 Rail Mount Brackets
- Description: Used with mounting rails that run horizontally or vertically.
- Material: Aluminum.
- Applications: Residential and commercial rooftop installations.
- Advantages: Provides strong, adjustable mounting; supports large panel arrays.
3.4 Flush Mount Brackets
- Description: Designed to mount panels flat against the roof surface.
- Material: Aluminum or steel.
- Applications: Flat or low-slope roofs.
- Advantages: Low profile, aesthetically pleasing.
3.5 Tilt Mount Brackets
- Description: Brackets that allow angle adjustment.
- Material: Aluminum or steel.
- Applications: Ground mounts or roofs where panel angle optimization is needed.
- Advantages: Maximizes solar exposure throughout the year.
3.6 Pole Mount Brackets
- Description: Brackets designed for mounting panels on poles.
- Material: Steel or aluminum.
- Applications: Ground mounts, streetlights, or remote installations.
- Advantages: Flexible positioning, easy maintenance.
4. Materials and Tools Needed for Installation
4.1 Materials
- Solar panel brackets: Choose based on your installation type and panel size.
- Mounting rails: For rail-based systems.
- Fasteners: Stainless steel bolts, nuts, washers (corrosion-resistant).
- Roof flashing: To prevent leaks.
- Waterproof sealant: Silicone or polyurethane sealant for sealing holes.
- Anchors or lag bolts: For securing brackets to roof structures.
4.2 Tools
- Power drill with various drill bits.
- Socket wrench or spanner set.
- Measuring tape and ruler.
- Level for alignment.
- Marker or pencil.
- Ladder or scaffolding.
- Safety equipment: gloves, goggles, harness.
5. Preparing Your Installation Site
Before installing solar panel brackets, thorough preparation is essential:
- Roof Inspection: Check the roof’s structural integrity, age, and material compatibility.
- Layout Planning: Determine solar panel placement for maximum sunlight exposure and minimal shading.
- Local Regulations: Verify local building codes, permits, and HOA restrictions.
- Weather Considerations: Plan installation during favorable weather to avoid rain or high winds.
6. Step-by-Step Guide to Installing Solar Panel Brackets
Step 1: Plan Your Installation Layout
- Measure your solar panels and roof area.
- Sketch the layout, marking bracket positions aligned with panel mounting holes.
- Consider spacing for thermal expansion and ventilation.
Step 2: Mark Bracket Locations
- Use a pencil or marker to mark exact points on the roof or mounting surface.
- Double-check measurements for accuracy.
Step 3: Drill Pilot Holes
- Drill pilot holes using the appropriate drill bit size.
- Drill carefully to avoid damaging roofing material or underlying structures.
Step 4: Install Roof Flashing and Brackets
- Slide roof flashing under shingles or roofing material at each mounting point.
- Position the bracket over the flashing.
- Secure brackets using lag bolts or anchors into roof rafters or structural supports.
- Apply waterproof sealant around all holes and bracket bases.
Step 5: Attach Mounting Rails (If Applicable)
- Secure mounting rails to installed brackets.
- Ensure rails are level and aligned.
Step 6: Mount Solar Panels
- Lift solar panels onto the rails or brackets.
- Align panel mounting holes with bracket holes.
- Fasten panels securely using bolts and washers.
- Check panel alignment and level.
Step 7: Final Inspection
- Tighten all bolts and fasteners.
- Inspect for gaps or potential leak points.
- Test panel stability by gently applying pressure.
7. Safety Considerations During Installation
- Always use proper fall protection equipment when working on roofs.
- Wear gloves and safety glasses to protect against sharp edges and debris.
- Use stable ladders or scaffolding.
- Avoid working in wet or windy conditions.
- Follow manufacturer guidelines for torque specifications on bolts.
8. Common Installation Challenges and How to Overcome Them
| Challenge | Cause | Solution |
|---|---|---|
| Roof leaks after installation | Improper flashing or sealing | Use high-quality flashing and sealants; ensure holes are sealed correctly. |
| Corrosion of brackets | Use of non-corrosion-resistant materials | Choose anodized aluminum or stainless steel brackets and fasteners. |
| Panel misalignment | Inaccurate measurements or leveling | Use a level and double-check measurements before tightening bolts. |
| Wind uplift risk | Insufficient fasteners or weak brackets | Use brackets rated for local wind loads; add extra anchors if necessary. |
| Uneven roof surfaces | Roof irregularities | Use adjustable brackets like Z brackets; shim or level mounting rails as needed. |
| Difficulty drilling into rafters | Lack of knowledge of roof structure | Use a stud finder or consult roof plans to locate rafters before drilling. |
9. Maintenance and Inspection Tips for Solar Panel Brackets
- Inspect brackets and fasteners annually or after severe weather events.
- Look for signs of rust, corrosion, or loosening.
- Clean debris from around brackets to prevent water pooling.
- Reapply sealant if cracks or gaps appear.
- Tighten bolts as needed to maintain stability.
10. Comparison Table of Popular Solar Panel Brackets
| Bracket Type | Material | Adjustable Angle | Best For | Installation Ease | Price Range | Durability |
|---|---|---|---|---|---|---|
| Z Bracket | Anodized Aluminum | Limited | RV roofs, boats, small panels | Easy | Low | High |
| L Bracket | Aluminum/Stainless | No | Flat roofs, walls | Easy | Low | Medium-High |
| Rail Mount Bracket | Aluminum | Yes | Residential/commercial roofs | Moderate | Medium | Very High |
| Flush Mount | Aluminum | No | Flat roofs | Easy | Medium | High |
| Tilt Mount | Aluminum/Steel | Yes | Ground mounts, adjustable angle | Moderate | Medium-High | High |
| Pole Mount | Steel/Aluminum | Yes | Ground or pole installations | Moderate | High | Very High |
11. How to Choose the Right Solar Panel Brackets for Your Project
Choosing the right solar panel brackets depends on several factors:
- Installation Surface: Roof type (shingle, metal, tile), ground mount, pole mount.
- Panel Size and Weight: Larger panels may require stronger or multiple brackets.
- Environmental Conditions: Wind speed, snow load, corrosion risk.
- Adjustability Needs: Fixed or adjustable angle brackets.
- Budget: Balance between cost and durability.
- Aesthetic Preferences: Low-profile or visible brackets.
Consulting with a professional or supplier can help you select the best brackets for your needs.
12. Why Choose CChannelSteel for Your Solar Panel Brackets?
At CChannelSteel, we pride ourselves on manufacturing and supplying premium solar panel brackets designed for durability, ease of installation, and superior performance.
Our Advantages:
- High-Quality Materials: We use 6005-T5 aluminum alloy with advanced anodizing to resist corrosion and UV damage.
- Wide Product Range: From Z brackets to rail mounts, we offer solutions for residential, commercial, and mobile solar installations.
- Custom Fabrication: We can tailor brackets to your specific dimensions and requirements.
- Competitive Pricing: Offering excellent value without compromising quality.
- Technical Support: Our experienced team provides expert advice and installation guidance.
By choosing CChannelSteel, you ensure your solar installation is supported by reliable, long-lasting hardware.
13. Conclusion
Installing solar panel brackets correctly is vital to the success and longevity of any solar power system. From selecting the right bracket type and materials to following detailed installation steps and maintenance routines, every aspect contributes to a safe, efficient, and durable solar setup.
This guide has provided a thorough overview of the installation process, common challenges, and practical tips to help you confidently install solar panel brackets. For high-quality solar mounting solutions and expert support, trust CChannelSteel to deliver products that meet your needs.
Harness the power of the sun with confidence — start your solar journey with the right brackets and professional installation today!
